
Google Merchant Center is where your product catalogue lives as far as Google is concerned. Shopping ads, Performance Max campaigns and the free product listings on Google all pull their titles, prices, images and stock levels from it. If Merchant Center is set up badly, every campaign built on top of it struggles.
This guide shows you how to set up Google Merchant Center for an online store, step by step, using the current Merchant Center interface (previously called Merchant Center Next). It covers Shopify and WooCommerce as well as stores that use a feed file.
What you need before you start
- A Google account you control, ideally a business email rather than a personal Gmail. Each Google account can only create one Merchant Center account.
- Admin access to your website or store platform, so you can install an app or add a verification tag.
- Your business details: registered business name, address and a customer service email or phone number.
- Live policy pages on your site: delivery, returns and refunds, privacy and contact details, linked from your footer.
- Your delivery rates and times for the UK, and any other countries you sell to.
Create Merchant Center under your own Google account, not one belonging to a developer or agency. If someone else needs access later, add them as a user. You should always own the account.
Step 1: Create your Merchant Center account
- Go to merchants.google.com and sign in with the Google account you want to own the business.
- Enter your business name and the country your business is based in. Choose carefully, as the business country cannot be changed later.
- Answer the questions about where customers buy (on your website, in a physical shop, or both) and whether you use an ecommerce platform.
- Accept the terms of service to finish creating the account.
If you use Shopify or WooCommerce, you can also start the process from the platform’s Google app or plugin, which creates or connects the Merchant Center account for you. We cover that in Step 5.
Step 2: Add your business information
Open Settings (the gear icon) and go to Business info. Fill in:
- Business name exactly as it appears on your website.
- Business address. This also sets your account’s time zone.
- Customer service contact details, such as an email address and phone number.
Make sure these match what customers see on your site. Google checks that a store is a real, contactable business, and inconsistent details are one of the triggers for misrepresentation reviews later.
Step 3: Verify and claim your website
Verifying proves you own the website. Claiming reserves that website address for your Merchant Center account, so no other account can list products from it. You need both before your products can show.
In Settings, go to Business info and edit your online store. Enter your website address, including https://, then choose a verification method:
- Ecommerce platform: if you connect through the Shopify or WooCommerce integration, this is usually handled for you.
- HTML tag: add a meta tag to the head of your homepage. Google recommends this for platforms like Shopify if the Analytics method fails.
- HTML file: upload a file Google gives you to your site’s root folder.
- Google Tag Manager or Google Analytics: works if you have admin access to an account already installed on the site.
Once verified, claim the website. If it says the site is already claimed by another account, that usually means an old account set up by a previous developer or agency. You can choose to take over the claim, but check first that no other account you rely on is using it.
Step 4: Set up shipping and returns
Products without delivery information can be disapproved, and wrong delivery costs cause mismatches with your checkout. Go to Settings, then Shipping and returns.
For a typical UK store, add a delivery service for the United Kingdom with:
- Delivery cost, for example a flat £3.95, free over £50, or rates by weight or price band. It must match what customers pay at checkout.
- Handling time, meaning how many working days it takes you to dispatch an order.
- Transit time, meaning how long the courier takes once dispatched.
- Cut-off time for same-day dispatch, if you offer it.
Then add a return policy. You will be asked for the URL of your returns page, the countries it applies to, the return window (for example 30 days), how customers return items and whether there are any fees. Keep this consistent with the returns page on your site.
If you sell outside the UK, add a separate delivery service for each country with its own costs and times. Do not reuse your UK rates unless they genuinely apply.
Step 5: Add your products
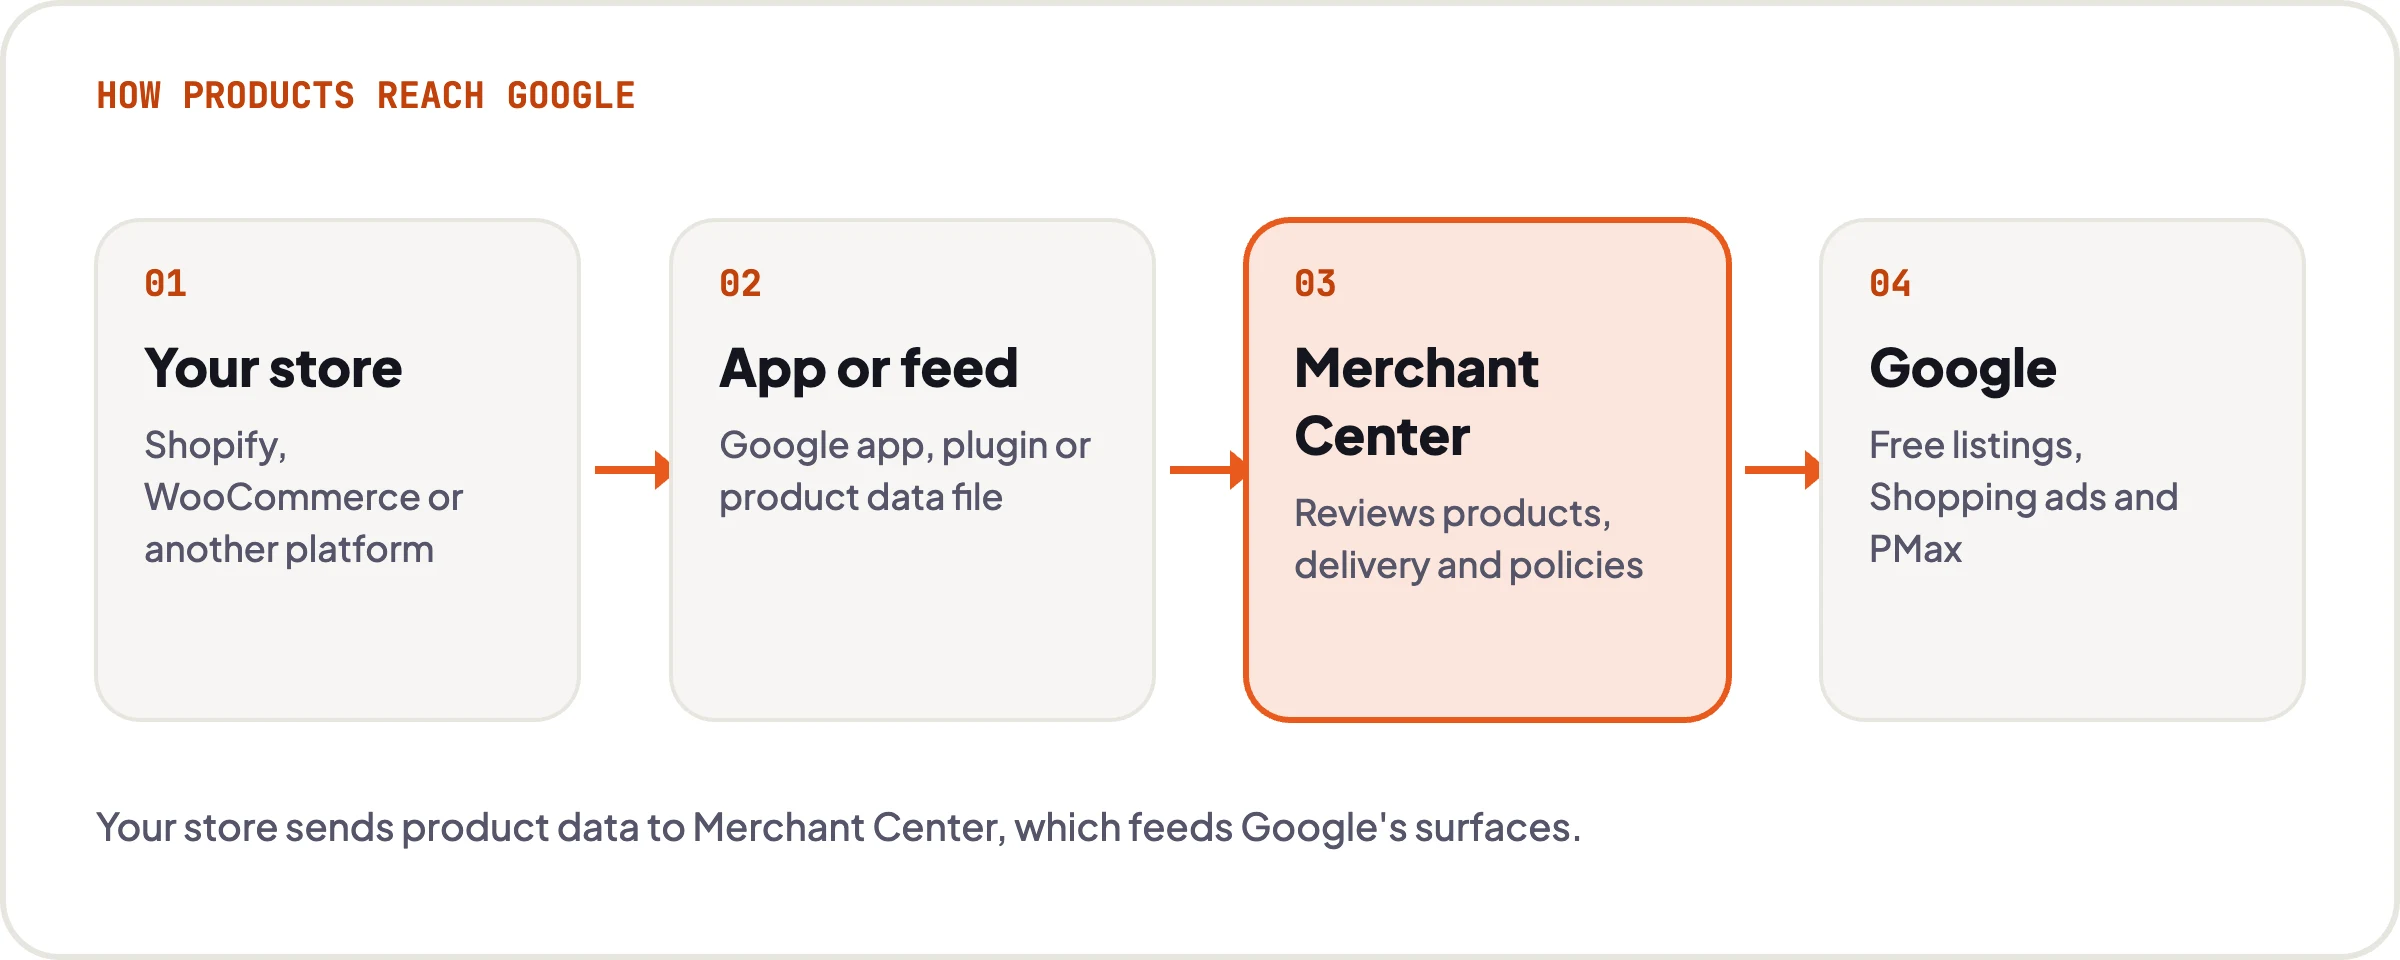
There are three common ways to get products into Merchant Center. Pick one main method and stick to it, as mixing sources can create duplicates.
Shopify: the Google & YouTube app
- Install the Google & YouTube app from the Shopify App Store.
- Connect your Google account, then create or connect your Merchant Center account. The app usually verifies and claims your domain for you.
- Review the app’s requirements checklist (policies, contact details, delivery) and fix anything it flags.
- Choose which products to sync. Products then update automatically when you change them in Shopify.
Add a barcode to each variant in Shopify where your products have one, so the GTIN reaches Google.
WooCommerce: Google for WooCommerce
- Install the free Google for WooCommerce extension from your WordPress dashboard.
- Follow the set-up flow to connect your Google account and create or link a Merchant Center account.
- Set your delivery rates and target country in the set-up steps, and map product attributes such as GTIN and brand.
- Let it sync, then check the product status inside the plugin and in Merchant Center.
Any platform: a feed file
If you use another platform, or need more control, add a data source in Merchant Center under Products. You can upload a file, link a Google Sheet, or point Google at a file hosted on your site and set a daily fetch. Each product needs at least an ID, title, description, link, image link, price and availability, plus a GTIN or brand and MPN where they exist.
Merchant Center can also find products by crawling your website. It is a useful fallback, but a proper app or feed gives you cleaner, more reliable data.
Step 6: Check free listings are on
Free listings let your products appear across Google, including the Shopping tab, without paying for clicks. They use the same product data as your ads. For most new accounts they are switched on by default, but check in Merchant Center that your products are eligible to show in free listings, and that your account has no setup issues blocking them.
Free listings will not replace paid campaigns for most stores, but they cost nothing and help Google build up data on your products.
Step 7: Link Merchant Center to Google Ads
- In Merchant Center, open Settings and find the section for apps and services you have linked.
- Choose to add Google Ads. You can link an existing account you have access to, create a new one, or send a link request to an account ID.
- If you are an admin on both accounts, the link is approved straight away. Otherwise, approve the request from the other side.
When you create a new Google Ads account, set the currency to GBP and the time zone to London, as these cannot be changed later. Once linked, you can build campaigns. Our guide on how to create a Google Shopping campaign takes it from here, and our Performance Max for ecommerce guide covers the other main option.
Step 8: Check diagnostics and fix issues
Google reviews new products before they show, which typically takes a few working days. Once data has processed:
- Look for any account-level issues shown in a banner at the top of Merchant Center. These affect every product and come first.
- Go to Products and open the tab for products that need attention. You can filter by issue and see how many products each one affects.
- Fix the cause at the source (your store or your feed), not just in Merchant Center, or the problem will return on the next sync.
If products are being rejected, our guide on how to fix disapproved products in Google Merchant Center walks through the most common reasons and how to clear them.
Before you spend on ads, make sure conversions are tracked properly. Linking Merchant Center is only half the job if Google Ads cannot see your sales.
Common mistakes to avoid
- Creating the account under a developer’s or agency’s Google login, so you lose access later.
- Delivery costs in Merchant Center that do not match your checkout.
- Missing or hard-to-find returns, privacy and contact pages.
- Syncing products from two sources at once, which creates duplicates and conflicting data.
- Leaving GTINs blank when your products have barcodes.
- Choosing the wrong business country at sign-up.
- Launching ads before checking that products are approved.
Let us do it for you
Want Merchant Center set up right first time?
We set up and clean up Merchant Center for UK ecommerce brands, including feeds, delivery settings and policy checks, then build and manage the Google Ads campaigns that run on it. Flat monthly fees, no long contracts, and you own every account.