
Facebook and Instagram ads can be one of the most profitable ways to grow an online store, but only if the set-up is right. Most disappointing Meta campaigns fail before a single ad runs, because tracking is missing or the campaign is optimising for the wrong thing.
This guide walks you through setting up Meta Ads for an ecommerce store step by step, in the order that avoids the common mistakes.
What you need before you start
- A Meta business portfolio (previously called Business Manager) at business.facebook.com.
- A Facebook Page for your brand, with your Instagram account connected to it.
- An ad account inside your business portfolio, with a payment method added.
- Access to your website so you can install the Meta pixel and Conversions API.
Create everything inside your own business portfolio, in your name. If you ever work with an agency or freelancer, give them access rather than letting them create accounts you do not own.
Step 1: Set up your business portfolio and ad account
- Go to business.facebook.com and create a business portfolio using your business name and work email.
- In Settings, add your Facebook Page and connect your Instagram account.
- Under Accounts → Ad accounts, create a new ad account. Set the currency to GBP and the time zone to London. These cannot be changed later.
- Add a payment method under Billing.
Step 2: Install the Meta pixel and Conversions API
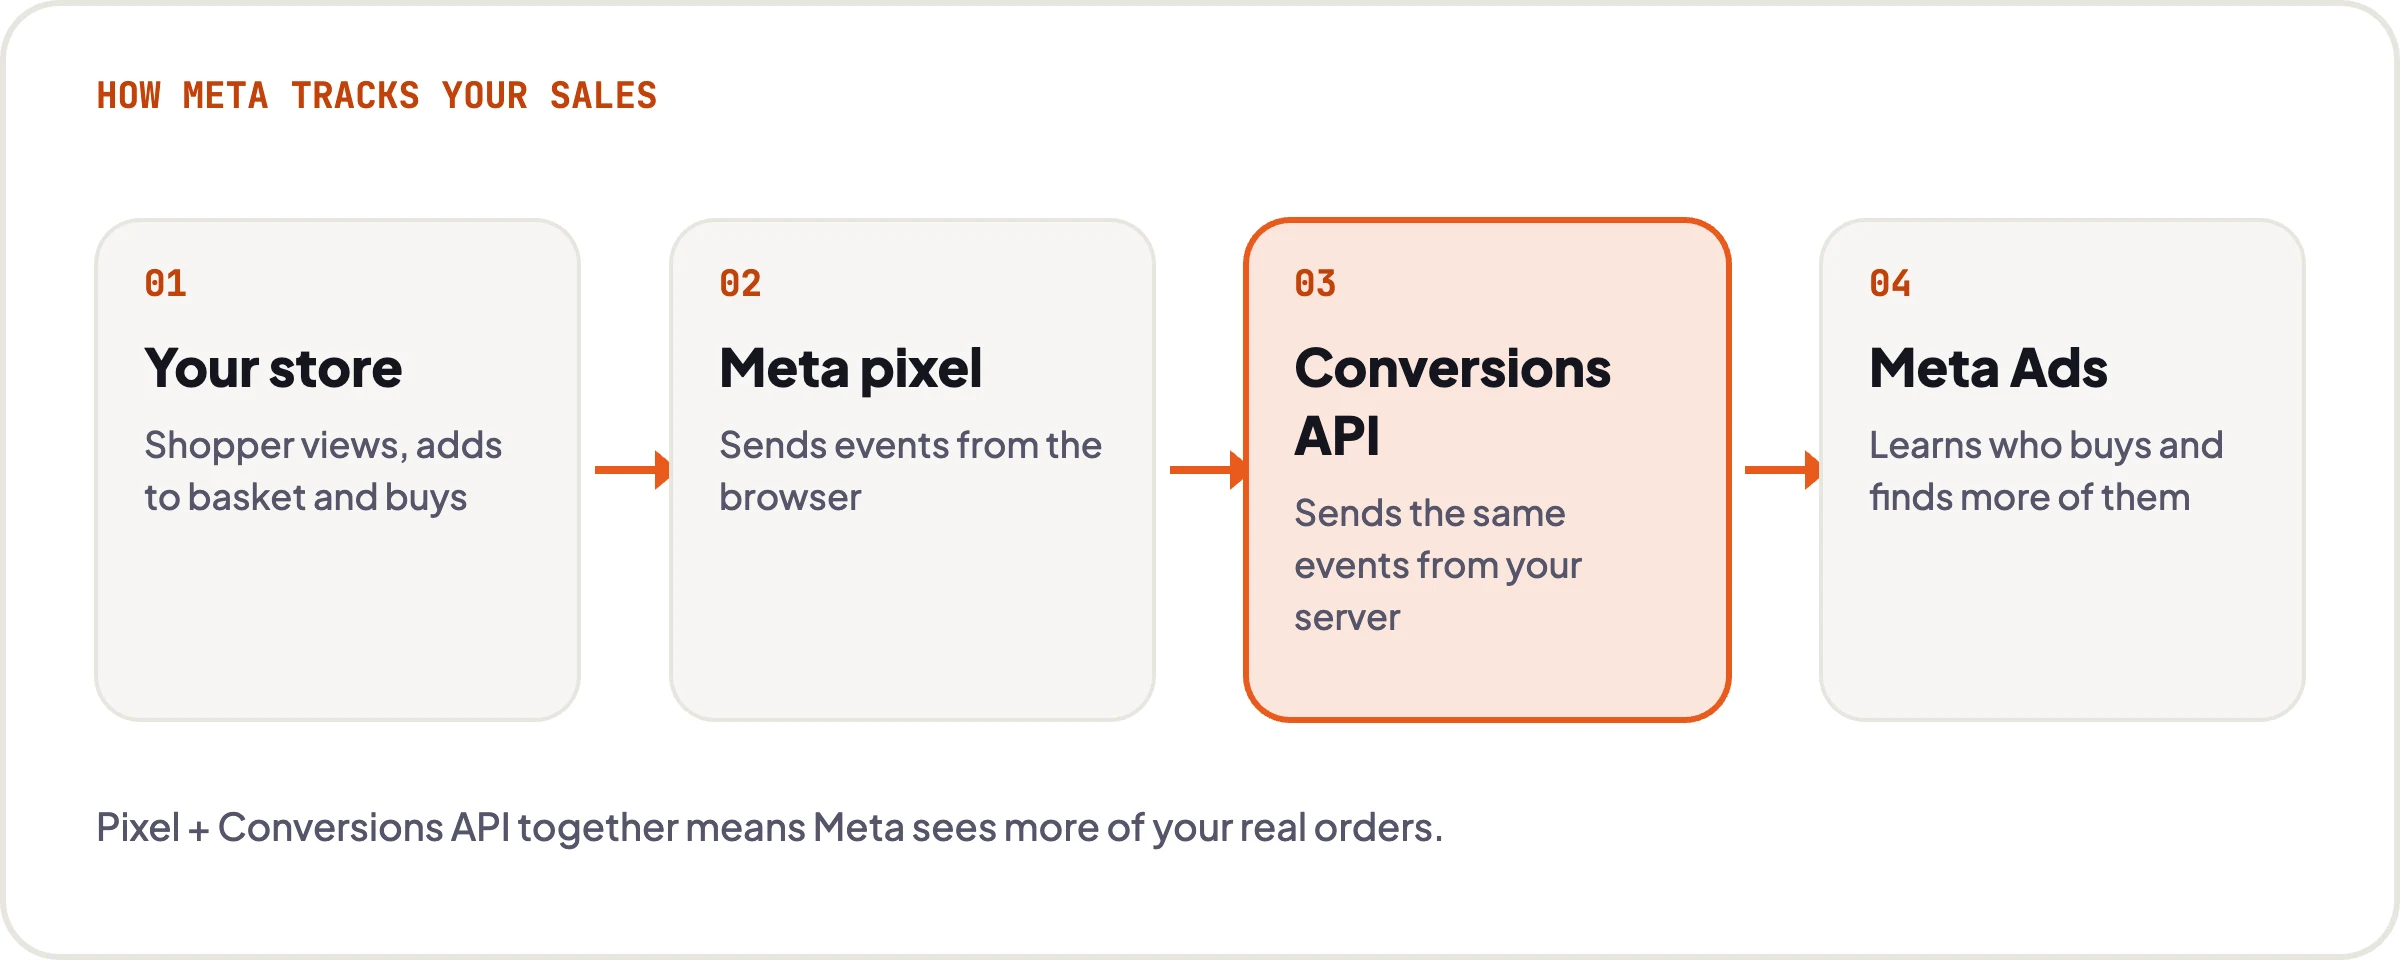
The pixel tracks what visitors do on your site. The Conversions API sends the same events from your server, which recovers many of the sales the browser pixel misses because of ad blockers and privacy settings. You want both.
- Shopify: install the official Facebook & Instagram app, connect your business portfolio, and set data sharing to the maximum level. This sets up the pixel and Conversions API together.
- WooCommerce: install the official Facebook for WooCommerce plugin and connect it to your business portfolio. Check that server events are switched on.
Step 3: Verify your domain and check your events
- In business settings, go to Brand safety → Domains and verify your website domain, usually by adding a DNS TXT record.
- Open Events Manager and select your dataset (pixel).
- Use Test events and go through your site: view a product, add to basket, start checkout and, if you can, place a test order.
- Check that PageView, ViewContent, AddToCart, InitiateCheckout and Purchase all appear, and that Purchase includes the order value and currency.
If Purchase events are missing or show the wrong value, stop here and fix them. Meta uses these events to decide who to show your ads to, so wrong data means wasted budget.
Step 4: Connect a product catalogue (recommended)
A catalogue lets Meta show your actual products in ads, including dynamic ads that remind people of items they viewed. On Shopify and WooCommerce, the official apps above can sync your products to a catalogue automatically. Check in Commerce Manager that your products, prices and stock levels match your store.
Step 5: Create your first sales campaign
- In Ads Manager, click + Create and choose the Sales objective.
- Meta will suggest Advantage+ settings, which use its automation for audiences, placements and budget. For most stores these are a sensible starting point.
- Set the conversion location to your website, select your dataset, and choose Purchase as the conversion event.
- Set your budget. Start with an amount you are comfortable spending for at least two to four weeks while Meta learns.
- Set the location to the United Kingdom, or the countries you deliver to.
- Leave Advantage+ placements on unless you have a specific reason to exclude a placement.
Step 6: Create your ads
- Use several creatives: a mix of square (1:1) images or carousels for feeds and vertical (9:16) assets for Stories and Reels.
- Write a few variations of primary text and headlines, so Meta can test what works.
- Lead with the benefit, not the product name: what problem it solves, why it is better, and any offer such as free delivery.
- Send people to the most relevant page, usually the product or collection page, not your homepage.
- Add UTM parameters to your URLs so you can see Meta traffic clearly in Google Analytics.
Step 7: Launch, then leave it alone
After launch, each ad set enters a learning phase while Meta works out who is most likely to buy. Meta generally needs around 50 conversions per ad set per week to exit learning. Making big changes to budget, targeting or creative during this time resets it.
Give a new campaign at least a week before judging it, and judge it on cost per purchase and return on ad spend (ROAS), not clicks or likes.
How much should you spend?
There is no fixed minimum, but small budgets learn slowly. A useful way to think about it: if your target cost per purchase is £20, reaching 50 purchases a week means around £1,000 a week. You can start lower, but expect results to take longer to stabilise.
To know whether ads are profitable, work out your break-even ROAS: divide 1 by your gross margin. With a 40% margin, break-even is 2.5x.
Common mistakes to avoid
- Running ads with the pixel only and no Conversions API.
- Choosing the Traffic or Engagement objective when you want sales.
- Splitting a small budget across too many ad sets, so none gets enough data.
- Editing campaigns every day before they have finished learning.
- Using one creative and letting it fatigue.
- Sending all traffic to the homepage.
Let us do it for you
Want this set up properly, first time?
We set up Meta Ads for UK ecommerce brands, including tracking, Conversions API, catalogue and campaigns, then manage and optimise them every week. Flat monthly fees, no long contracts, and you own every account.